Building your own gaming rig gives you far greater control over the final result and saves you money over buying a pre-built one, but you might be unsure where to start. You may even feel intimidated; it’s natural to be afraid of breaking something expensive if you’ve never done this before.
There’s an old saying: “an ounce of prevention is worth a pound of cure.” It’s true about almost everything, but when it comes to building your own gaming PC, an ounce is worth a ton of cure.

As long as you read, plan, and prepare very carefully before you start playing with delicate PC components, you’ll be just fine. (PC part manufacturers have an incentive to make sure noobs can do this successfully, after all—they wouldn’t make much money if only engineers could figure it out.)
We’ve done all the ground-level research for you—all you have to do is follow along. In this guide, we’ll take you step-by-step through the process of building your next gaming PC. We’ll cover:
- What each part of a gaming PC does;
- Basic tools and supplies you’ll need;
- Picking the right parts based on your needs and budget;
- Assembling everything in the right order;
- Testing and configuring your new rig.
Be sure to bookmark this article so you can refer back to it as needed throughout each phase of your PC building adventure. Let’s dive in!
How to Build a Gaming Computer for Beginners
It’s true that when you choose to build your own rig over paying someone else to do it for you, you assume a certain amount of risk. It’s also true that when inexperienced PC builders break something, it’s almost always because they were rushing or didn’t fully understand what to do before attempting it.
We want to stress that this really isn’t difficult to do, but you’ll need one thing above all else: patience. There will be times when you finish one small part of your build only to realize that you have no idea what to do next. There will also be times when something doesn’t quite work even though you’re positive you did everything right.
The golden rule of building your own gaming PC is: when there’s a problem or you’re unsure how to proceed, stop, breathe, and do some more research. You can do it! 🤓
How to Build a Gaming PC: Preparation
Before you start putting components together (or even ordering them), you’ll need some basic supplies and know-how.
Supplies You’ll Need:
Here are some of the common household items that you’ll need when building your own gaming PC:
- Small flathead and Phillips screwdrivers (a #0 and a #1 of each should do nicely)
- Small needle-nose pliers
- A grounding bracelet, or antistatic wrist strap, which helps prevent static electricity from damaging your PC parts ⚡
- A non-carpeted area to work in (ideal, but not strictly necessary)

- Really good lighting (a desk lamp with a bright LED bulb is fine)
- A selection of small and medium zip ties
- A second working PC (or a tablet or smartphone) you can use to ask the internet for help
- A video cable to connect to your onboard graphics, not just the cable for your GPU, if they’re different (this will be important later)
Common Shopping Mistakes to Avoid
Triple check each part you’re thinking about buying to make sure it’s compatible with all the others. Sites like PCPartPicker have some great tools for this. Whether you use such a tool or not, read each product description carefully. In most cases, everything you need to know about the part is right in the page title.
For example, this motherboard is listed on Amazon as an “LGA1151 (Intel 8th and 9th Gen) M.2 USB 3.1 Gen 2 DDR4 HDMI DP CFX Dual Gigabit LAN ATX Z390 Gaming Motherboard.” That’s a mouthful, but it’s simple to break down:
- LGA1151 is the socket type; look for CPUs with the same nomenclature
- M.2 is currently the most common design standard for PC components (SATA and mSATA design standards—not to be confused with SATA cables—dominated in the past)
- USB 3.1 is the fastest USB specification currently available (3.0 is still common)
- DDR4 stands for “double data rate 4th generation” RAM and is the fastest kind you can currently buy. Older (DDR3) RAM is not compatible with DDR4 motherboards; it all has to match exactly.

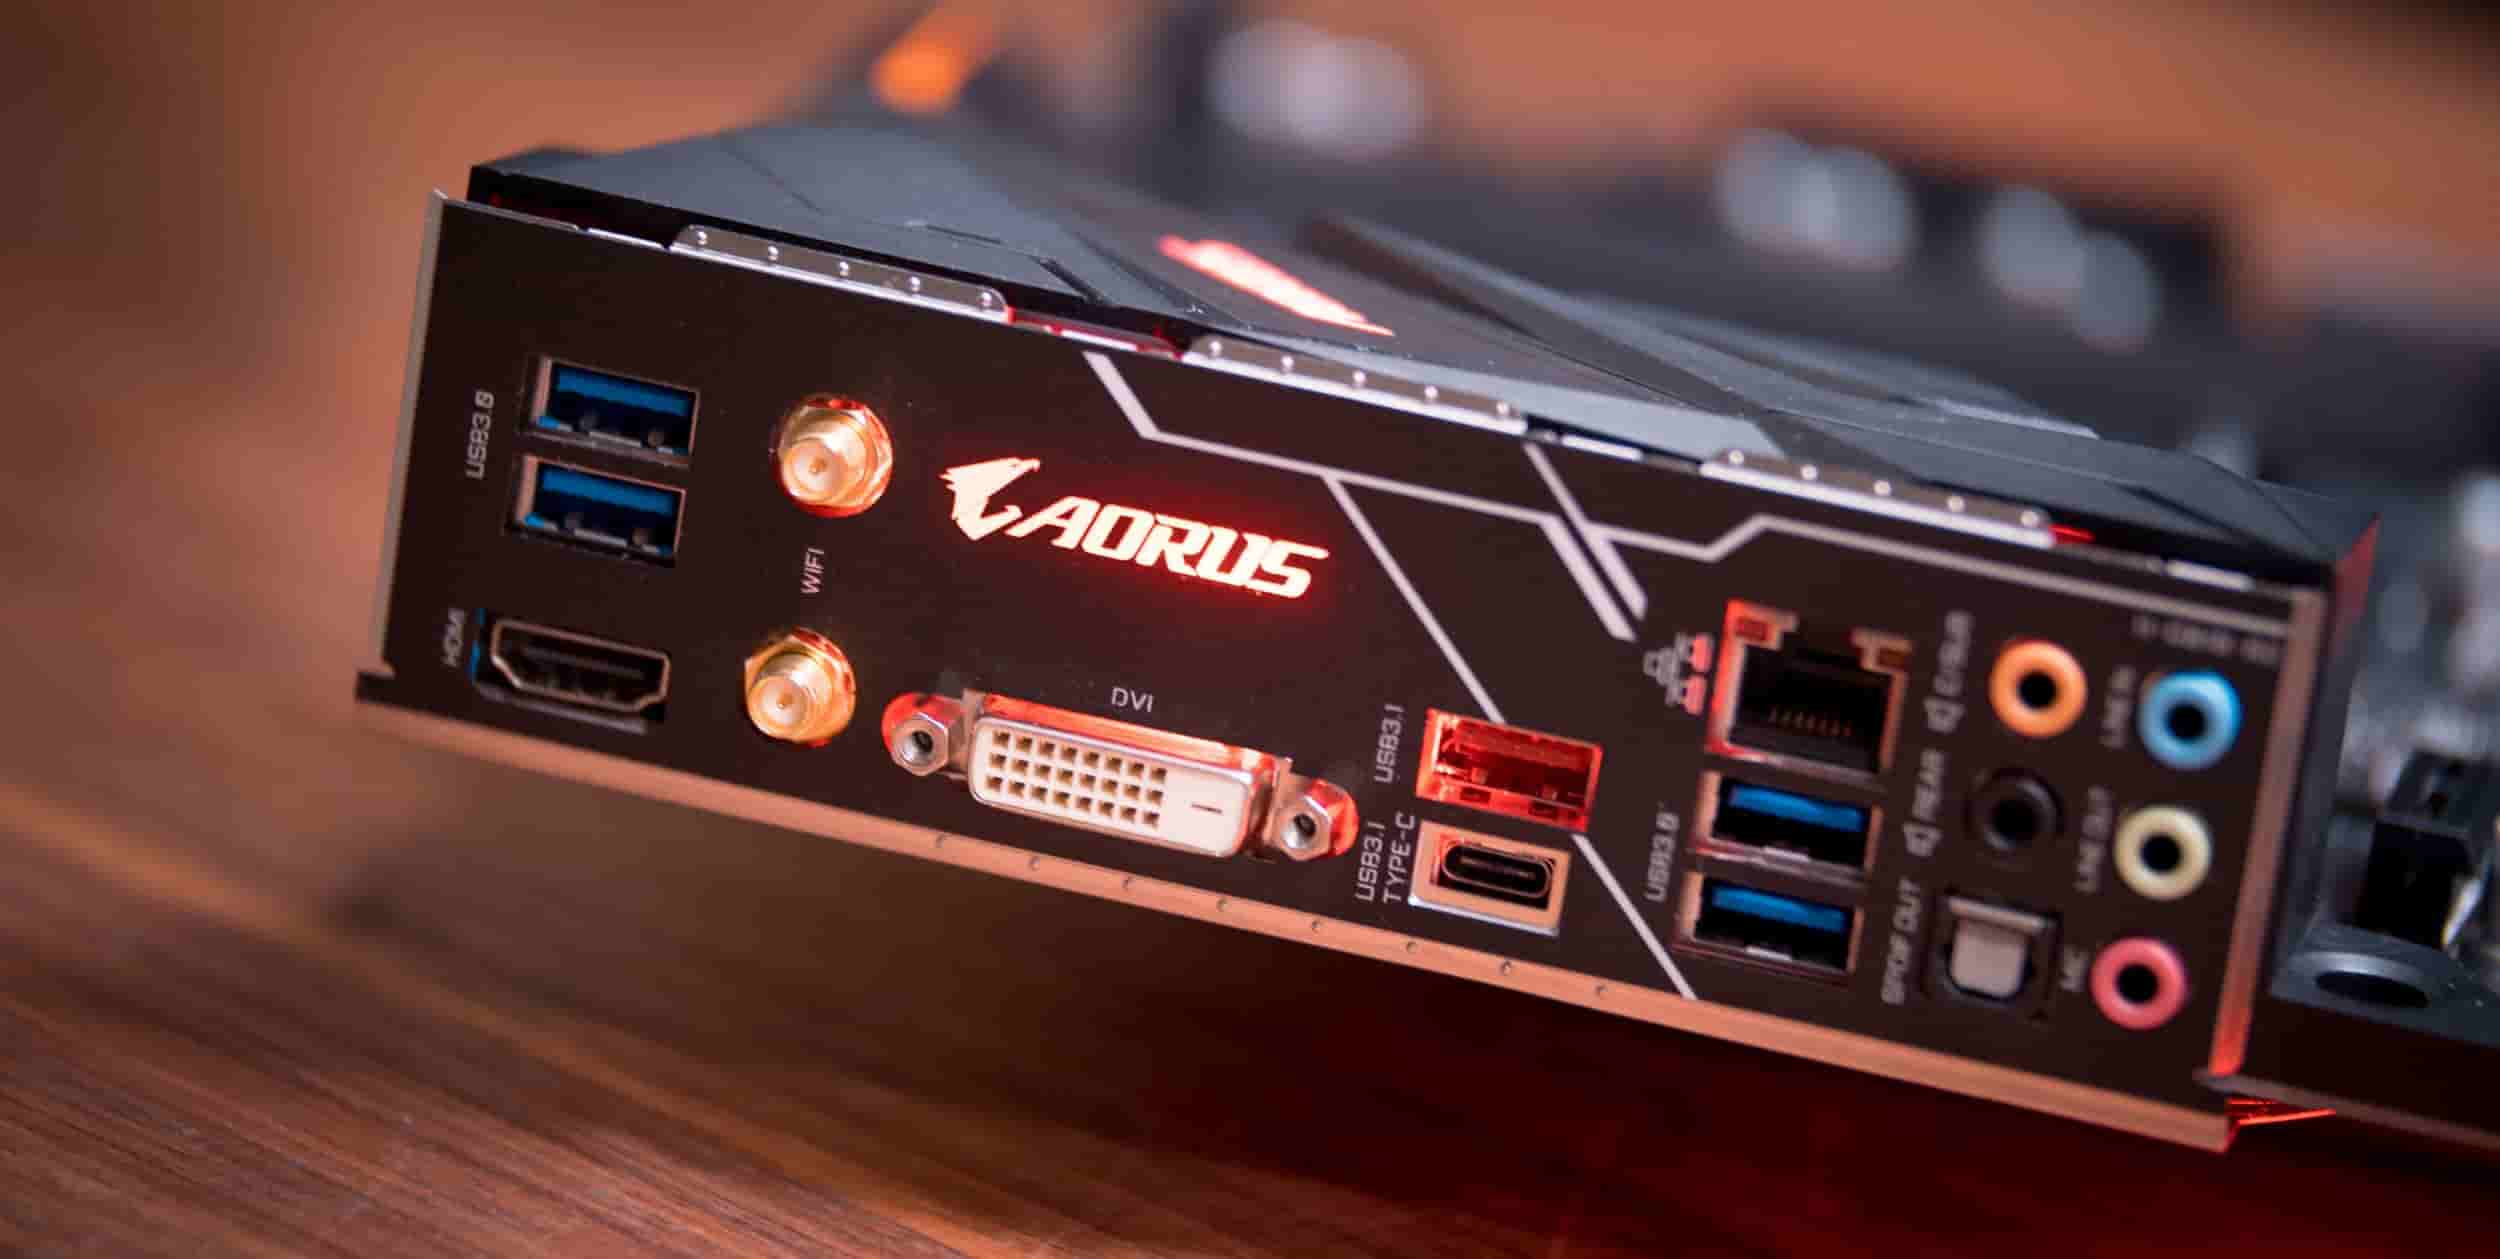
- HDMI and DP stand for “high-definition multi-input” and “DisplayPort,” respectively. These are the types of video outputs that the motherboard supports. You may also see “RGB” or “DVI” on some (usually less expensive) boards. You’ll need to ensure that your monitor or TV accepts the same types of inputs.
- CFX is AMD’s proprietary architecture that supports running two AMD video cards together. NVIDIA cards use “SLI” to mean the same thing. Most motherboards support either AMD or NVIDIA cards if you’re only using one of them, but if you plan to use two, you’ll need a motherboard that specifically states it’s compatible with whichever brand you plan to use.
- ATX is a motherboard configuration standard that describes its size and layout. Your tower/case needs to accommodate the same standard.
- Z390 is an Intel chipset; just like the socket type, this needs to match your CPU
Technology evolves at breakneck speeds, and PC parts are no exception. These specific terms may be obsolete within the next few years, but as long as you know what they refer to, staying up to date on the latest and greatest should be easy; the basic process of building a PC isn’t likely to change anytime soon.
How to Build a Gaming PC: Choosing the Best Components
Any gaming PC needs the same basic parts, but build quality, performance, and price all vary widely. The most frugal (and patient) gamers can get out the door for around $500, while there’s almost no upper limit to how much a gaming PC can cost.
The newest, hottest components may not be the best choices for you, even if you can afford them. Once you start spending more than $1,000 or so on your hardware, most of what you’re paying for at that point is the difference between “medium” and “high” graphical settings, which is fairly negligible in most games.
This becomes even truer (and even less noticeable) once you exceed $1,500; few games can take full advantage of such powerful hardware anyway.
That being said, if stunning photo-realism and buttery smooth frame rates are important to you, you can have them—they just cost more.
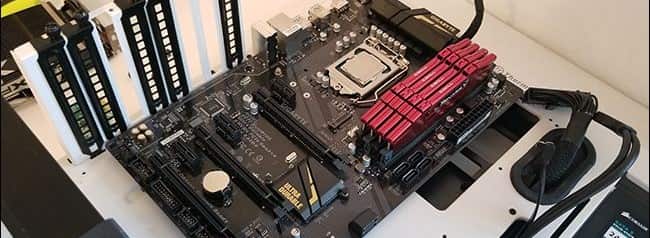
Motherboard
Plan to spend: $100 to $250
The motherboard is the brain of your PC. It’s the only part that’s directly connected to all of the others, and its job is to gather the signals/data/electricity from each of them and send the “sum” of all that information to your monitor and speakers in the form of video and audio feeds.
The amount you’re willing to spend on your motherboard largely determines how much you’ll be spending overall; cheaper boards won’t even support more expensive components, and putting cheap components in an expensive board would just be wasteful (if they even fit).
Your motherboard is arguably the one PC component you don’t want to skimp on relative to your budget, but it can be hard to tell if a cheap motherboard is a piece of junk or if it really is well-made for its price point. As with most things, reading a variety of reviews will likely be the best way to find the best motherboard for gaming.
Popular motherboard manufacturers include MSI, ASUS, EVGA, and Gigabyte. No matter which brand you decide on, you’ll need to make sure you get the right socket type for whichever CPU you’ve got your eye on. The latest and greatest in AMD processors use an AM4 socket, while modern Intel CPUs use an LGA1151 (v2) socket.
Tip: You might encounter LGA1150 sockets too. If that confuses you, refer to our LGA 1150 vs. LGA 1151 comparison.
The size of your motherboard matters, too. There are three sizes: ATX, Micro-ATX, and Mini-ATX, from largest to smallest. (Yes, it’s somewhat counterintuitive, but mini is smaller than micro.) Some PC cases will only accommodate motherboards of a certain size.
Finally, some of the best motherboards for gaming come with fancy extras you may or may not care about, like built-in WiFi cards and ultra-high-speed USB ports. If those things are important to you, have at it, but don’t pay for them if you don’t need them.
GPU
Plan to spend: $120 to $1,000+
Your GPU (graphics processing unit, or video card) is the part that actually draws slightly different versions of the same picture 60-90 times per second to create the illusion of movement on your screen. GPU hierarchy lists might help you when making these decisions, no matter whether you’re on a tight budget, or looking for an expensive ‘beast’.
Along with your motherboard and CPU, the GPU you choose will probably be one of the three most expensive components you buy; budget models start around $120, while the mightiest flagship cards can run well into four digits.AMD and NVIDIA share the biggest chunk of the GPU market by far. (We happen to have an opinion on the best AMD graphics cards for gaming.) GPUs from other manufacturers may be of questionable quality and may not be supported by some games.
The first question to ask yourself when browsing video cards is: what exactly do you need it to do? Some gaming-related tasks are far more demanding than others in terms of required horsepower. Here’s a quick table to help you roughly estimate what different GPUs can handle based on price.
| High-End ($600+) | Midrange ($250-$600) | Budget-Friendly ($120-$250) |
|---|---|---|
| 4K displays | Single ultrawide monitors | Single regular HD monitors |
| VR | Multiple regular HD monitors | Performance-friendly games |
| Multiple ultrawide monitors | Most games on medium settings, some on high | Some games on low or medium settings |
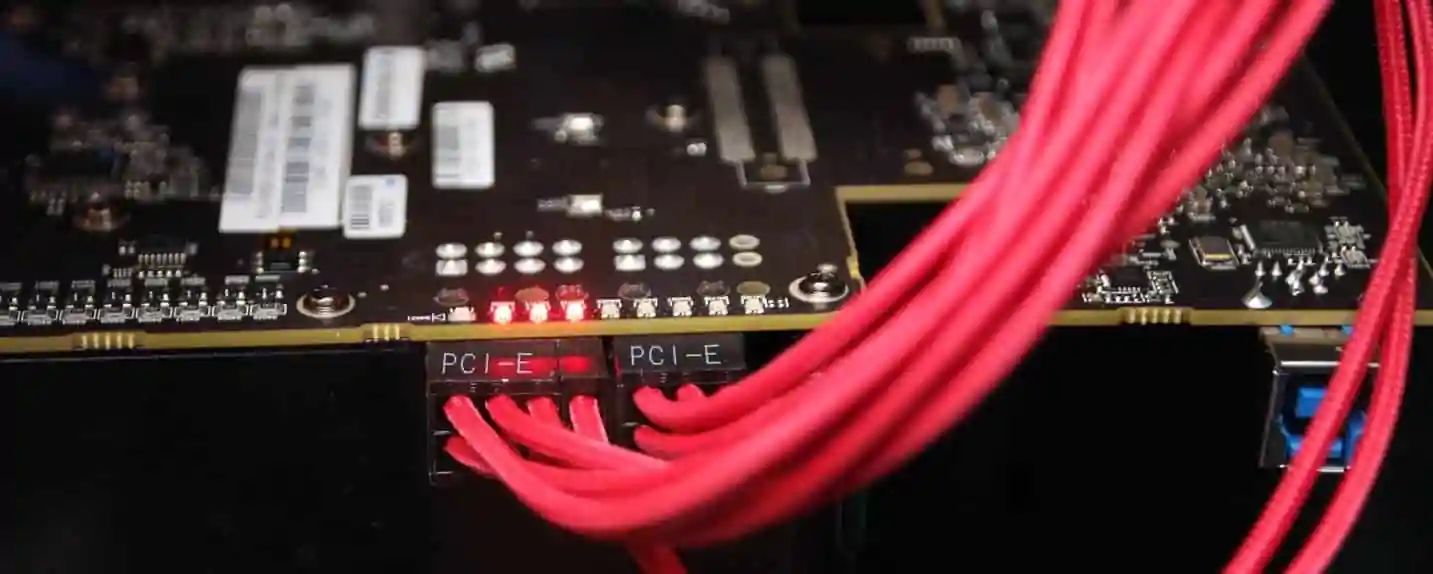
Most mid-range and high-end cards have 16 lanes, but some cheaper models might have fewer, and your motherboard needs to have a GPU slot with the exact number of lanes for your card.
Don’t be discouraged by this, as you can easily enjoy most newer titles even on a budget. For example, getting the best graphics card under $300 can carry your gaming sessions for years to come. Although, not all of it will be on the highest settings.
CPU
Plan to spend: $100 to $500
CPU stands for “central processing unit.” It’s responsible for doing all the math and logic operations that any given program might require. They’re generally a little bit less costly than video cards, but the best CPUs for gaming are still one of the more expensive components you’ll need. The total beefiness of your CPU, GPU, and the motherboard will be the biggest factors in determining your PC’s overall performance.
Intel and AMD are the two biggest players in the CPU market. A vast majority of gaming motherboards are designed for one chipset or the other; make sure you’re matching and not mixing. Note that chipset and socket type are different things, and both need to match. If you’re going to be using your rig exclusively for gaming, we recommend getting some of the best Intel CPUs for gaming.
The speed at which a processor can do math is measured in gigahertz (GHz), which is usually a pretty good snapshot of its overall quality, but it’s not the whole picture. Many factors determine how well or poorly suited a CPU will be to gaming. For example, some of the best AMD processors for gaming might lag behind Intel in video game performance but are much better for doing video editing and similar work.

For one thing, the big flashy number on the box is the CPU’s internal clock speed, which is different from its external clock speed. The external clock speed is how quickly the CPU can communicate with other components in the PC; it plays a big role in determining your rig’s overall performance, and it’s usually much lower than the internal speed. The external clock speed should be listed somewhere on the box or product page, but it will likely be in a much smaller font.
Finally, you’ll also want to take note of whether a given CPU is a 32-bit or 64-bit model. All other factors being roughly equal, 64-bit CPUs are much faster than their 32-bit counterparts. Nowadays, nearly any CPU marketed to gamers will be 64-bit. 32-bit processors are getting harder to find, but they do still exist, so make sure you’re comparing apples to apples.
Take a look at our CPU hierarchy list, if you want to find out more about the topic and have a more detailed look into new generations of CPUs.
RAM
Plan to spend: $60 to $250
RAM stands for “random access memory.” It’s basically a temporary storage area for data that gets cleared after a certain time or when your PC shuts down. RAM can transmit data much faster than a hard drive can (even faster than solid-state drives).
When you see a loading screen in a game, that’s your hard drive transferring all the necessary data for the current map or level to your RAM. When it’s done, your hard drive takes a break and your RAM handles everything until the game tells the hard drive that different data is needed.
While CPUs and GPUs are responsible for most bottlenecks, insufficient or outdated RAM can cause them too, so it’s important to make sure you’ve got enough to handle the kinds of games you intend to play. There are two basic questions to ask: what’s the best RAM for gaming, and how much do you need?
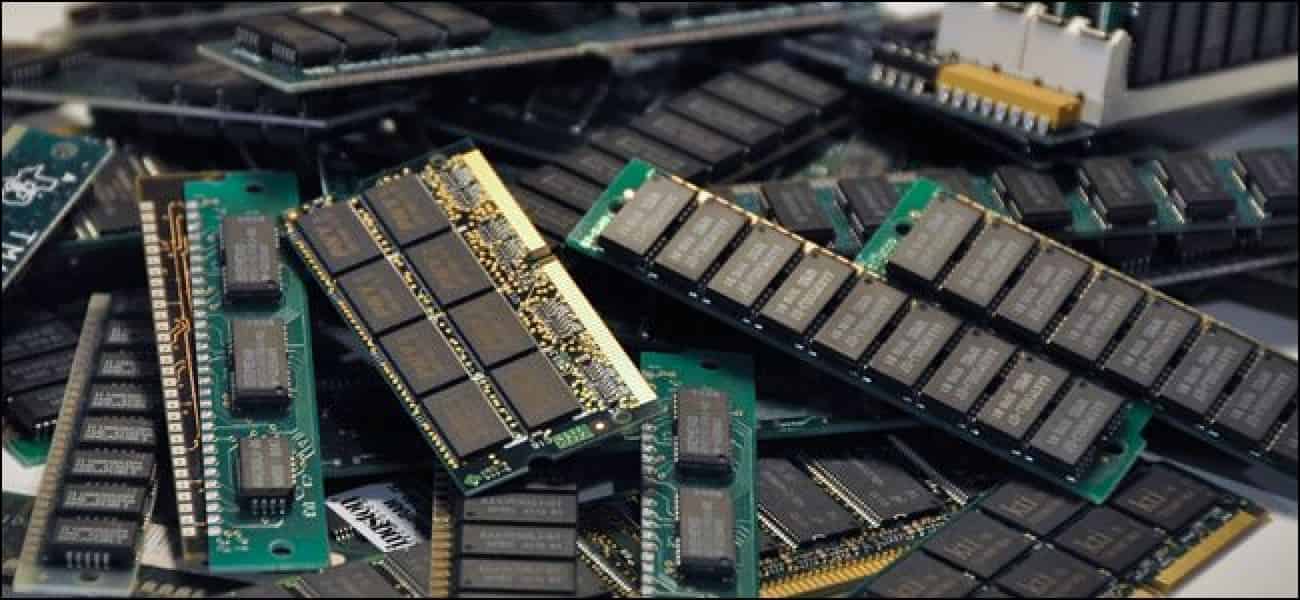
There are a bunch of different kinds of RAM: SRAM, DRAM, SDRAM, and SDR SDRAM, among others. 95% of RAM you’ll see in gaming PCs nowadays is DDR4 RAM (although older DDR3 is still viable, and might be a good choice if you’re looking to make every dollar count).
When it comes to how much RAM you’ll need, that too depends on what kinds of gaming you’re into. As a broad ballpark estimate, 8GB of DDR4 RAM is generally sufficient to run most modern games at their recommended system requirements, but you can get 8GB of RAM in different ways. Should you go with a single 8GB stick, two 4GB sticks, or even four 2GB sticks?
There are two ways to approach this question. One will lead you into the depths of techie forums all over the internet, where you’ll find endless numbers of people arguing over the best way to configure your RAM and never, ever reaching a consensus.
The simpler (and generally more sensible) answer is: for 99.9% of people, it really doesn’t matter. Using fewer, bigger sticks will leave you room to add more RAM to your system later (provided your motherboard still has available slots), but other than that, it’s not a big deal either way.
Hard Drive
Plan to spend: anywhere from $50 to $250 for a single hard drive
Hard drives come in two flavors: optical drives, also known as HDDs and solid-state drives. Both function differently and have their own benefits and drawbacks.
Optical drives have been around much longer. They’re slower and less expensive than solid-state drives, and they generally take up more space in your tower. If you crack one open, there’s a weird filmy disc in there; that’s what the data is stored on. A motor spins it around to be read by a laser (that motor makes noise, which is another drawback for some people).
Solid-state drives have no moving parts, so they don’t make any noise. They’re also tiny and can transmit data many times faster than optical drives can, but you’ll pay for the convenience—a 1TB SSD costs about 2-3x more than a 1TB optical drive. Still, they’re much cheaper now than when they first came out, and their real prices will only continue to fall as they become more widespread and more affordable to produce.

There’s a persistent rumor still floating around the internet that claims that solid-state drives have a shorter lifespan than optical drives because they can only read and write data so many times before they inevitably fail. This is technically true, but misleading, and it was a much bigger concern 15 years ago than it is today.
A modern solid-state drive has a typical “lifespan” of 50,000 to 100,000 read/write cycles, but that’s generally regarded as a fairly conservative estimate, and reports of SSDs actually failing due to age are rare.
Furthermore, 100,000 read/write cycles is a staggering number that translates to many years of use (even with heavy gaming every day). Most people will upgrade or completely replace their gaming PCs long before their old solid-state drive ever gives up the ghost.

If you can afford one, getting the best SSD for gaming is clearly the superior choice. Even basic models can offer huge improvements in load times, and since they’re so small, you can fit several in the same amount of space that a single optical drive would occupy. (Efficient use of space is especially important when it comes to keeping things cool inside your case.) If you’re going for an SSD, make sure to learn the differences between SATA and NVMe beforehand.
Still, optical drives are cheap, and that alone makes them pretty attractive to some gamers.
Power Supply Unit
Plan to spend: $35 to $250
The power supply unit or PSU is exactly what it sounds like: a brick of circuitry and wires that supply electricity to everything in your PC that needs it. Many gamers building their own PCs don’t devote as much careful thought to selecting a power supply as they do to their CPUs and GPUs, and that’s a shame. Picking the best power supply for gaming is essential for peak performance—and the wrong power supply can be a safety hazard.
Every other component in your PC should tell you how much power it consumes. Some brands are better than others about putting that information on the package or somewhere in the insert, but if you can’t find it, you may need to call the manufacturer. It’s important to know how much power you need to run your PC—don’t just guess.
Note that PC components list their power usage in two ways: peak draw and sustained (or average) draw. Both are important, but the sustained draw is what you should focus on. Peak draw is the maximum amount of power a component is capable of using, but that should never happen for very long. The sustained draw is an estimate of how much power the component will use under normal working conditions.

It’s important to know both figures to ensure that you don’t invite problems ranging from your PC suddenly shutting down mid-game to full-blown electrical fires. Once you’ve added up the sustained draw of all of your PC components, double it. That’s about the size of PSU you should be shopping for (if you need 500 watts, buy a 1,000-watt PSU).
Buying twice as much power as you “need” does two things: ensures that you’ll always have plenty of power available even if several components are running hard, and leaves you something of a cushion if you decide to upgrade one or two of them later on. (To be safe, never let your total sustained draw exceed about 70% of your PSU’s capacity.)
Unfortunately, there’s no shortage of shady, off-brand power supplies out there, and many of them are built poorly enough to constitute a fire hazard. Gaming forums are full of horror stories about gamers buying the cheapest no-name PSU they could find only to have it fail or even burst into flames (which usually takes out everything else in the PC along with it).

The good news is that a quality PSU doesn’t have to be terribly expensive—the brand is more important than the price tag. Corsair, Antec, and Seasonic all have excellent reputations when it comes to safety, and they all sell decent power supplies for under $50 (still, don’t forget to make sure the wattage is sufficient for your build). If you’re thinking about purchasing a lesser-known brand, research it carefully using our PSU tier list.
The desire to save money is understandable, but not when it comes with a risk of serious damage to your PC (or to your entire home). Spend an extra $10 or $20 if necessary to make sure you’re getting a safe, reliable product. If your new PSU is acting weird, you should consider learning how to test a power supply unit and subsequently replace it.
Cooling System (Optional)
Plan to spend: $50 to $100 for high-end air cooling, or $350+ for liquid cooling
Nobody would dispute the importance of keeping your PC components cool, but the internet, in general, has a tendency to wildly overstate how much extra cooling a typical gaming PC really needs. If you plan ahead and buy the right case for your components, you probably don’t need liquid cooling at all (yes, even if you’re splurging for the beefiest GPU currently on the market).
When gamers face overheating problems, it’s most often due to one simple and easily preventable cause: they’ve got too much stuff crammed into too small a case. A dozen of the best fans in the world will do you exactly no good if there isn’t plenty of empty space inside your case. Warm air needs somewhere to go, and if your PC components fit together like a jigsaw puzzle, that air is just going to stay right where it is and make them even hotter.

Granted, some people really do need extra fans or even liquid cooling setups—but they’re a fairly small minority. If you’re the kind of person who’s buying the hardware that really does need all the cooling it can get, you already know that. What’s more, liquid cooling systems are not only expensive, they’re much more difficult to install and prone to more serious problems than fans are (just imagine the entire inside of your PC getting doused with water).
At the end of the day, a majority of gaming PCs—even pretty powerful ones—won’t need any additional cooling beyond CPU coolers and a selection of case fans, if there’s plenty of extra room in the case. If you are concerned about your temps, look to extra air cooling before turning to liquid cooling—just make sure you’ll still have some extra space after the new fans are installed, or else they won’t do much good.
GPUs can tolerate much higher temperatures than CPUs can. 70/85 degrees Celsius for CPUs/GPUs are typical (and reasonably conservative) safe temperatures, but check your specific products for their particular thresholds. Clean, dust-free PCs with plenty of airflow on all sides should generally not have a problem keeping their components within those ranges.
Case
Plan to spend: $50 to $200
In most of this guide, we’ve talked about buying exactly what you need—no more, no less. When you’re looking at cases, though, the rule is different. There is no such thing as too much case space. A case that’s 50% empty is a great thing.
Bigger, full-tower cases generally cost more, but not always, and usually not a whole lot more. There are several reasons to go for a bigger case: more room for airflow (see the above section on cooling), more room for upgrades or additions, and they’re far easier to clean and maintain when all of your components aren’t crammed up against each other. However, some of the best mid-tower cases are also capable of doing all of the above.

A modular case—one that provides several different internal configuration options—is always a good bet. Such cases usually have multiple places for the motherboard and 2.5”/3.5” drive bays (make sure you get the right drive bays for the hard drives you’re buying), and some even accommodate power supplies on the top or bottom.
Whether you decide to spring for a modular case or not, make sure to get a case that supports the motherboard you’ve chosen (that is, check that the case is ATX, Micro-ATX, or Mini-ATX compatible and make sure it has the right number of mounting holes in the right places).
For some gamers, a PC’s case is one of its most important components. It’s the pretty, shiny exterior protecting the lovingly assembled, often not-so-pretty innards. However, if you’re on a budget you shouldn’t care about that. Instead, take a look at the best budget pc cases available on the market.
There are a ton of fancy extras to choose from when it comes to making your rig look rad if that’s important to you. RGB lighting is pretty popular nowadays, as are custom paint jobs and engraving. You can even make yours look like it came from the server room on a Star Destroyer.
Monitor
Plan to spend: $150 to $1,500 or more
A monitor isn’t technically a PC component, but you won’t get much use out of your new rig without one. Monitor prices range even more widely than GPU prices do; they can easily cost more than your new PC itself. That’s a good thing, though—it means you have lots of options.
Standard HD monitors are the current entry-level option for gamers. Even reasonably big ones can usually be had for under $200, but if you’re looking to spend even less and don’t mind playing on lower resolutions, 720p monitors can still be found. Most standard HD monitors will use HDMI, DVI, and/or RGB connections.
Ultrawide monitors are the next step up from standard HD in terms of image quality. They offer higher resolutions at different aspect ratios (21:9 as opposed to 16:9 for standard HD). You’ll pay more than you would for standard HD, but ultrawide monitors can sometimes cost even more than 4K displays, simply because of the sheer size their screens can reach (up to 50” as of this writing). Most use DP or HDMI cables.

4K monitors are the best of the best if prettiness is your top priority. Medium-sized 4K monitors (32” or so) aren’t as expensive as you might fear—around $400. You can get them in bigger sizes, but the price starts to climb pretty quickly; you’re looking at $600 by about the 42-inch mark and $1,500 or more for displays over 50”.
If you’re on the fence between ultrawide and 4K, it’s important to know that image quality isn’t the only difference between them. 4K, by definition, isn’t ultrawide (at least not yet). They only come in 16:9. If you prefer a huge field of view, 21:9 monitors (which top out at 3440×1440—still a perfectly respectable resolution) are currently the only way to go. Most 4K displays use DP or HDMI 2.0 cables.
Mouse, Keyboard, & Headset
Plan to spend: $100 to $300 for all three
If you thought there were a lot of PC components out there to choose from, wait until you see the dizzying array of peripherals. No matter what kinds of games you like to play, there are mice, keyboards, and headsets built with your particular needs in mind.
Mice
Gaming mice come in many varieties for almost any genre or preference. When looking for the best gaming mouse, consider your preferences and general playstyle before dedicating to a purchase.
Mice for shooting games have highly customizable DPI settings for maximum accuracy and extra long primary and secondary buttons to accommodate whichever style of mouse grip you might prefer;
Best MMO gaming mice often come with separate miniature keyboards for quick access to your ability hotkeys or custom buttons to make voice and text chat more convenient;

Specialty ergonomic mice are available for gamers with existing hand or wrist-related health concerns;
General purpose gaming mice come with standard features like multiple profile settings for different games and plenty of extra buttons that can be bound to any keyboard function. For example, if you’re a fan of Overwatch, you should find out what is the best gaming mouse for Overwatch to better enjoy that particular game.
Keyboards
The age-old debate over mechanical vs. membrane keyboards is still alive and well. There are other considerations too, such as whether or not you care about having a wireless gaming keyboard and the different kinds of mechanical keyboard switches.
Mechanical keyboards are loud and typically more expensive, but they have a more active tactile response and often boast shorter response times. Membrane keyboards are cheap and quiet, but are generally less durable and have shorter lifespans;

Both kinds of keyboards can be found with gamer-friendly hotkeys, shortcuts, and other special features.
Headsets
Headsets come in three main flavors for different needs. Some common bonus features include retractable microphones, 7.1 or 3D audio support, and independent volume controls for chat and game audio.
Wired gaming headsets are usually the least expensive models. They offer better sound quality and don’t require batteries in exchange for the minor inconvenience of being tethered to your PC;

Bluetooth headsets are easy to set up and use with multiple devices, but are subject to interference from other electronics and don’t have the best range;
Non-Bluetooth wireless gaming headsets are a little less convenient to set up and moving them requires moving their individual transmitters as well, but they have better range than Bluetooth headsets and your other devices are less likely to mess with their signals.
Operating System
Plan to spend: $99 to $140 (or nothing, if you’re lucky)
Some gamers make it most of the way through the PC building process before suddenly remembering that they didn’t budget for a new copy of Windows. Make sure you’ll be able to comfortably buy a fresh Windows license for your new rig. (In some cases, you can transfer your old Windows license to your new PC by calling Microsoft and asking, but the terms of this offer change all the time and every situation is different. Definitely give it a try before spending the money again, though.)
When it comes to “choosing” your OS, you really don’t have many choices. For the most part, it’s Windows 10 or nothing (it’s one of the best versions of Windows to date, though, especially for gamers).

If you still have a Windows 7 license, don’t count on it being useful for much longer—many games no longer officially support it. A decent number of developers are still providing support for Windows 8/8.1, but it’s a pretty terrible OS and is notorious for being unstable with many PC games.
Windows 10 has some awesome built-in features for gaming, such as native gameplay recording and surprisingly useful integration for Xbox gamers. What’s more, Microsoft seems to have finally caught on to the fact that a huge number of its customers are regularly playing games on their PCs; the company is providing more direct support to hardware and software developers than ever before, and the result is a cleaner, more stable experience for most PC games.
MSRP for a fresh copy of Windows 10 Home is currently $140, but if you’re willing to be patient, sales are fairly common. You can often find it as low as $99 from third-party retailers.
How to Build a Gaming PC: Step by Step Guide
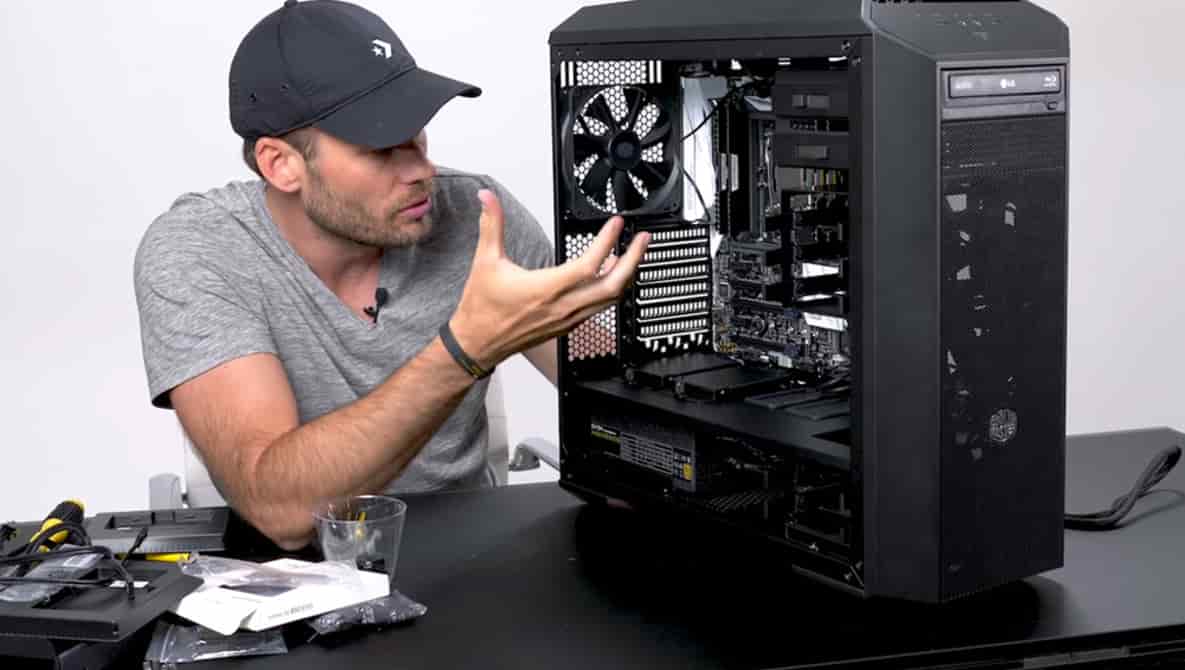
Once you’ve got all your shiny new (or gently used) components, it’s time to put them all together. This part really isn’t hard, but it does require some patience and a willingness to stop and double-check yourself if you’re not 100% sure about what you’re doing.
Step 1: Set Up Your Work Area
First things first. There are a few things you want to make sure you’ve accounted for before you even open any of your PC parts.

- Static electricity is your enemy. A sudden static discharge probably won’t hurt anything in most cases, but it can fry something important under the right conditions. It’s not worth the risk. Work in a non-carpeted area (if possible). Always make sure you’re wearing your grounding bracelet and that it’s properly grounded before touching any of your components.
- Keep liquids and pet hair far, far away from your work area. Thoroughly dust your working surface and any surfaces directly above it before getting started.
- Wash your hands thoroughly. Consider wearing disposable neoprene gloves if you have oily skin or if your hands are prone to sweating.
Step 2: Install the CPU
The first actual step is to attach the CPU to the motherboard. Lay the motherboard flat on a clean, non-porous surface (we’ll put it in the case later). Be very, very careful when handling the chip itself—don’t touch the connector pins and don’t force it into the motherboard. There’s no such thing as being too gentle here.
Set the CPU into the socket with the lightest touch you can manage. It should drop in freely if it’s aligned properly. If it doesn’t, back up and try again—never push on it.
Once the chip is inserted, liberally apply thermal paste to its top surface (all CPUs come with a tube of standard thermal paste, but if you’re especially concerned with heat, you can buy some deluxe stuff for a few extra dollars).Place the heat sink on top of the chip, making sure that it’s aligned properly with the brackets on the motherboard. Gently move it around to spread the thermal paste into an even layer.

This is one of the rare parts of the PC building process that will require some brute force. Tighten the clamps on the heat sink until they lock firmly into the motherboard on both sides. Most of the time, you’ll have to really push down on the clamps to get them to lock, but it should be a kind of pressure that increases steadily without feeling “uneven.” If you ever feel like something is about to snap or crack, stop and check that the clamps are precisely aligned with the brackets on the motherboard.
Step 3: Install Your RAM
Congratulations—the hardest and most dangerous part of building your PC is done! Now let’s do something easy and get your RAM sticks in there.

This part’s pretty simple. Find the RAM channels on the motherboard; they should be the only slots/grooves that match up perfectly with the pins on your RAM sticks. Ensure that the tabs on the sides are open, press each RAM stick firmly into place until it clicks, then lock the tabs in place.
Step 4: Connect Your Hard Drives to the Motherboard
Most hard drives connect to the motherboard with some variant of SATA cables (which should have come with the drive). You can use any SATA port on the motherboard; there are several to choose from. Pick the SATA port that will be closest to your hard drive bay once everything is assembled, or whichever port will keep the cable itself as out of the way as possible.

Repeat the process for all the hard drives you have and set them aside for now.
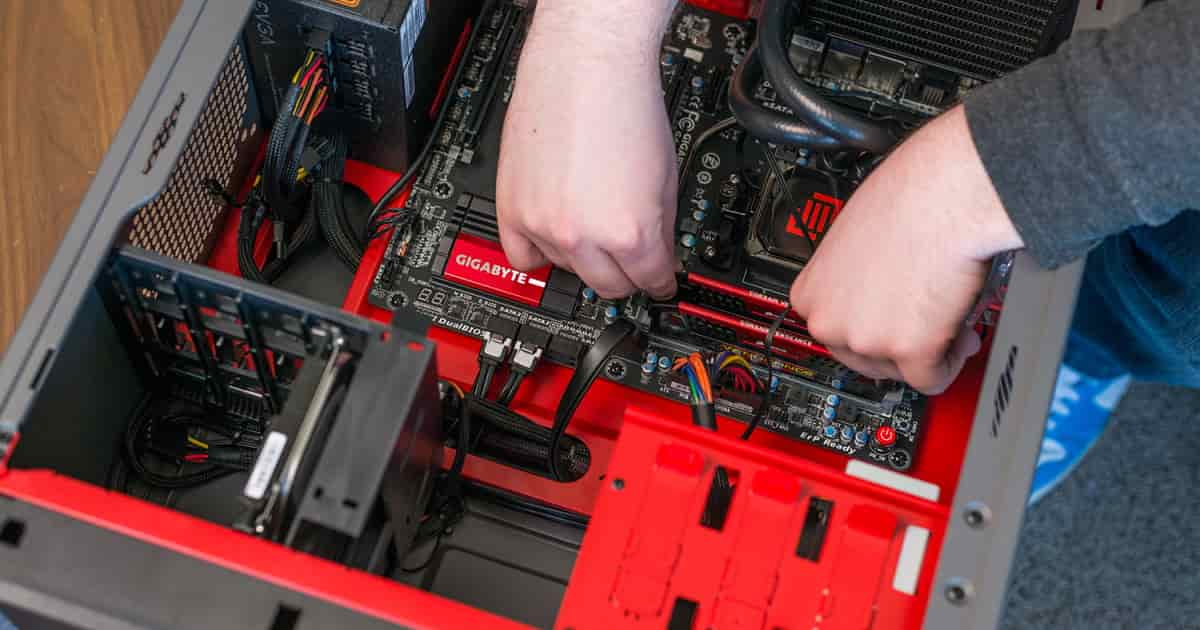
Step 5: Install the Motherboard
If your case has multiple mounting locations for the motherboard, pick the one that looks most convenient based on the other components you plan to install later.
Pop the side cover off of your case and lay it flat on your work surface. Gently lift the motherboard and the attached hard drives into the case and affix the motherboard with the included hardware.
Ensure that each screw is tight, but not too tight—overtightening a screw can crack the motherboard itself.
Step 6: Install Your CD-ROM Drive or Other Extras
If you bought a CD-ROM drive, Blu-Ray drive, or an internal SD card reader, disconnect all of its wires and pop it into the appropriate mounting bay from the front of the tower. Some cases have hardware-free mounting brackets; if yours does, the drive should snap firmly into place on its own. If your case has standard mounting brackets, use the included screws to fix the drive firmly into place.

Once the drive is mounted, connect it to the motherboard with a SATA cable, but leave the power cord disconnected for now.
Step 7: Install the Power Supply
Most PC cases have a mounting bracket for the power supply on the bottom, but some cases have one on the top as well. If you have more than one to choose from, use whichever one will crowd the other components the least.
If you’ve already taken your power supply out of the box, you’ve undoubtedly noticed that it has an absolute buttload of cords. Some fancier models have detachable cords that can be removed if they’re unused; that does wonders to save space in your case. If yours doesn’t have this feature, we’ll do some cable management later.

For now, install the power supply in the appropriate bracket. Use screws in the case of a standard mounting bracket, or simply push it into place until you feel a firm click if your case has hardware-free mounting brackets.
Step 8: Connect the Power Supply
No matter what components you chose, your power supply should have more than enough connectors for all of them. There are many different kinds of connectors. Some have a single cord with a single connector head—this is called an X-pin connector (that is, an 8-pin connector if there are eight pins).
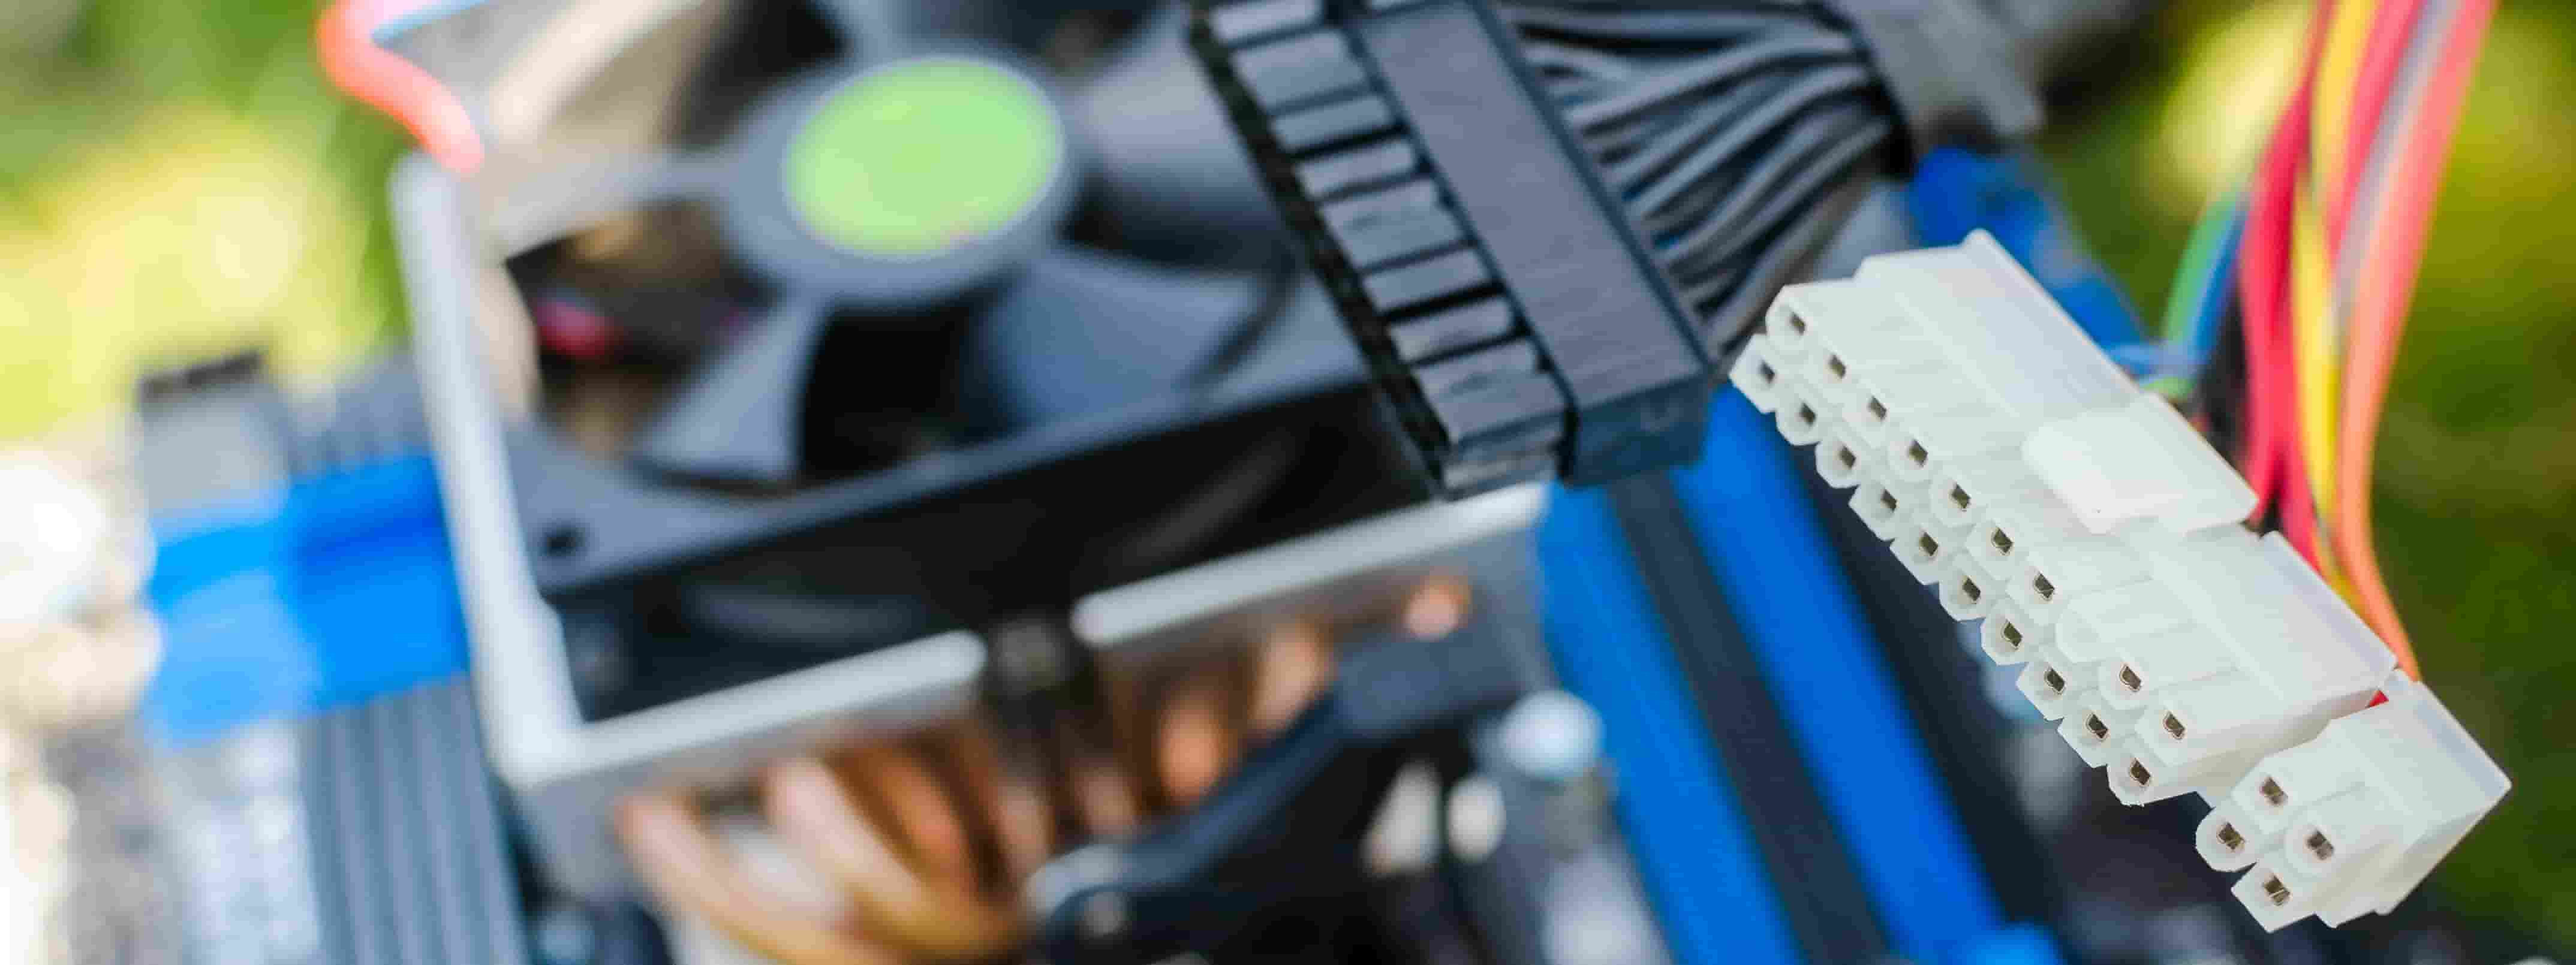
Connect each of your PC components that require power (which should be pretty much all of them) to your power supply with appropriately sized connectors. Some do’s and don’ts to keep in mind:
- Do make sure each connector is firmly seated
- Do use needle-nose pliers to gently and steadily wiggle a power connector free if you need to remove it. Grip the plastic hub of the connector with the pliers, not the pins or the cables themselves
- Don’t mismatch the number of pins, unless an X+Y connector allows you to make a perfect match. Never plug a standard 8-pin connector into a 6-pin socket and just leave two extra pins hanging off to the side. It’s a safety issue, and it probably wouldn’t even work anyway
- Don’t use two separate connectors as though they were a single X+Y connector (don’t put two completely separate 4-pin connectors into the same 8-pin slot, for example)
If you went with a modular power supply, this step will become much easier.
Step 9: Keeping Everything Cool
Connect the case fans to the power supply or motherboard (most case fans connect directly to the motherboard and draw power from it). If you bought extra fans, they should have come with their own mounting brackets or instructions on how to affix them to your case.

If you’ve purchased a liquid cooling system, refer to its instructions for setup and installation. Liquid cooling systems can be complicated and their installation procedures vary widely, so we can’t offer much specific advice for them.
Step 10: Install Your Hard Drives in the Case
By now, your motherboard should be affixed to your case and your hard drives should be attached to the motherboard with SATA cables, but not yet mounted in the case themselves. Let’s change that.

All internal hard drives are either 2.5” or 3.5”. Most cases will have bays for both sizes, but if yours doesn’t, simple and affordable conversion kits exist. You know the drill by now: simply snap the drives into place if the bays are hardware-free, or screw them tightly into place if they aren’t.
Step 11: Install the GPU
Before installing your GPU, now would be a good time to tidy up all the cords we’ve used so far. Use zip ties to secure loose cables to the interior frame of the case or to other cables, but in either case, don’t over-tighten the zip ties—tighten them just enough to keep the cables secure. Never zip-tie cables directly to electrical components or in such a way that the zip tie or the cable might obstruct a fan or prevent the case from closing.

Create as much free space as you can around the motherboard and any moving parts. Detach or secure all unused power supply cables, leaving one free for each of your video cards (most cards use a single 8-pin connector, but check yours ahead of time).
Once your cables are neat and pretty, install the GPU by pressing it firmly into the motherboard’s PCI-e slot. (If it has more than one, but you’ve only got one video card, either slot will do.) Apply steady pressure until you feel an obvious click.
Some video cards have a small tab that can be pressed down to further secure the card in place. Make use of it if yours has one. Connect the power cable, secure it, and we’re almost done!
Pro Tip: If your GPU fans aren’t spinning, it doesn’t necessarily mean it’s broken. Before replacing it, check out some easy fixes.
Step 12: Connect Peripherals and Install Operating System
Set your case right-side-up and connect your keyboard, mouse, video, and ethernet cables. Make sure you use your onboard graphics card (the motherboard’s RGB, DVI, or HDMI output) for now, not your GPU; most GPUs won’t work right out of the box without first installing some drivers, so if you connect directly to your GPU now, you’ll likely see nothing but a black screen.
Connect the grounded power cord to the power supply unit, switch it on, and power on your PC. Insert your Windows USB stick or CD. Your system may automatically detect the OS installation media; if it doesn’t, restart your PC.
If you still aren’t prompted to install Windows, watch the startup screen. There will be a message telling you how to enter BIOS by tapping a certain key (usually F2, F8, or DELETE, but it could be any key). Once you’ve successfully entered the BIOS screen, look for an option called “boot menu” or “boot from the device.” Choose whichever drive your OS installation media is in, set it as the default boot device, and restart one more time—now you should be able to install Windows, which will take some time.
Step 13: Test Runs, BIOS Updates, & Final Adjustments
If everything’s gone well, you should finally be looking at a default Windows desktop. Open a browser and follow these instructions to ensure that your BIOS is up-to-date.
Once you’ve either updated your BIOS firmware or confirmed that it’s already current, it’s time to get your GPU working. Navigate to its manufacturer’s website and hunt around for a “drivers” or “downloads” section. Some GPU manufacturers still offer individual downloads for each card they make, but many now use downloadable clients that manage and update your GPU automatically. (In NVIDIA’s case, for example, you’ll want to download a program called GeForce Experience.)

Download and install the appropriate drivers for your video card. Afterward, your PC should recognize that there’s an external video card installed, but it may not be using it at the moment. It should automatically switch to using your GPU once it’s installed and updated (and sometimes once you’ve restarted your PC again), but that doesn’t always happen. If it doesn’t, you can fix the problem in a few short steps.
For NVIDIA cards, right-click anywhere on your desktop and select “NVIDIA control panel.” From there, go to “manage 3D settings.” Under the “global settings” tab, change the drop-down menu from “auto-select” to your specific GPU. Click “apply” and you should be good to go.
For AMD cards, the process is different. Right-click on the desktop and open the AMD control panel. Select “graphics,” then “PowerPlay.” Select “maximize performance” for both the “plugged in” and “battery” settings. Finally, select “gaming,” then “3D application settings” and set the slider to “maximum performance.” That should tell your games to always use your AMD card.
Enjoy Your New Gaming PC!
You’ve done it! You’ve built the best gaming PC you’ve ever owned (hopefully), and it’s working properly. That wasn’t so hard, right? Now, you can apply other modifications. For example, you can set up an outstanding sound card to boost headset audio quality as it’s not an integral part of PC building.

Building your own gaming PC is one of those things that can seem daunting if you’ve never done it before, but once you get some hands-on experience, you’ll wonder what you were ever so worried about. Now you should have the confidence and know-how to make your next build faster and easier.
By the way, you’ll probably want some of the most comfortable gaming chairs to go with your new PC—be sure to check out our reviews and buying guides for those. Good job, and game on!
Sources:
- Types of Computer Cases and Motherboard Factors, Utilize Windows, November 30th, 2011
- Processor Handling Guidance, AMD Support
- Custom vs. Prebuilt PC, Razer Forums