Deviljho is one of the older monsters in Monster Hunter World by now, but he’s still not one to be taken lightly. He’s fast, strong, and durable, so you’ll need a solid plan and finely-tuned gear to take him down. Fortunately for you, we’ve bagged dozens of these bad boys so far, and we’re happy to share what we’ve learned along the way.
In this superlatively useful guide, we’ll take you step by step through the process of unlocking the first Deviljho hunting quest, choosing the right weapons and armor, tracking down the monster itself, and—most importantly—surviving the fight. Let’s get to it, monster hunters!
Unlocking the Quest
You won’t lay eyes on a Deviljho until after you’ve successfully hunted at least one Pink Rathian during the quest “Old World Monster in the New World.” (If you need help beating that beast, we’ve got an in-depth Monster Hunter World Pink Rathian guide right here.)
You’ll also need to have a hunter rank of at least 12, but if you’re this far into the game, it’s almost impossible to be any lower than that; this requirement exists mostly to stop you from joining another player’s Deviljho hunt with a brand new character.
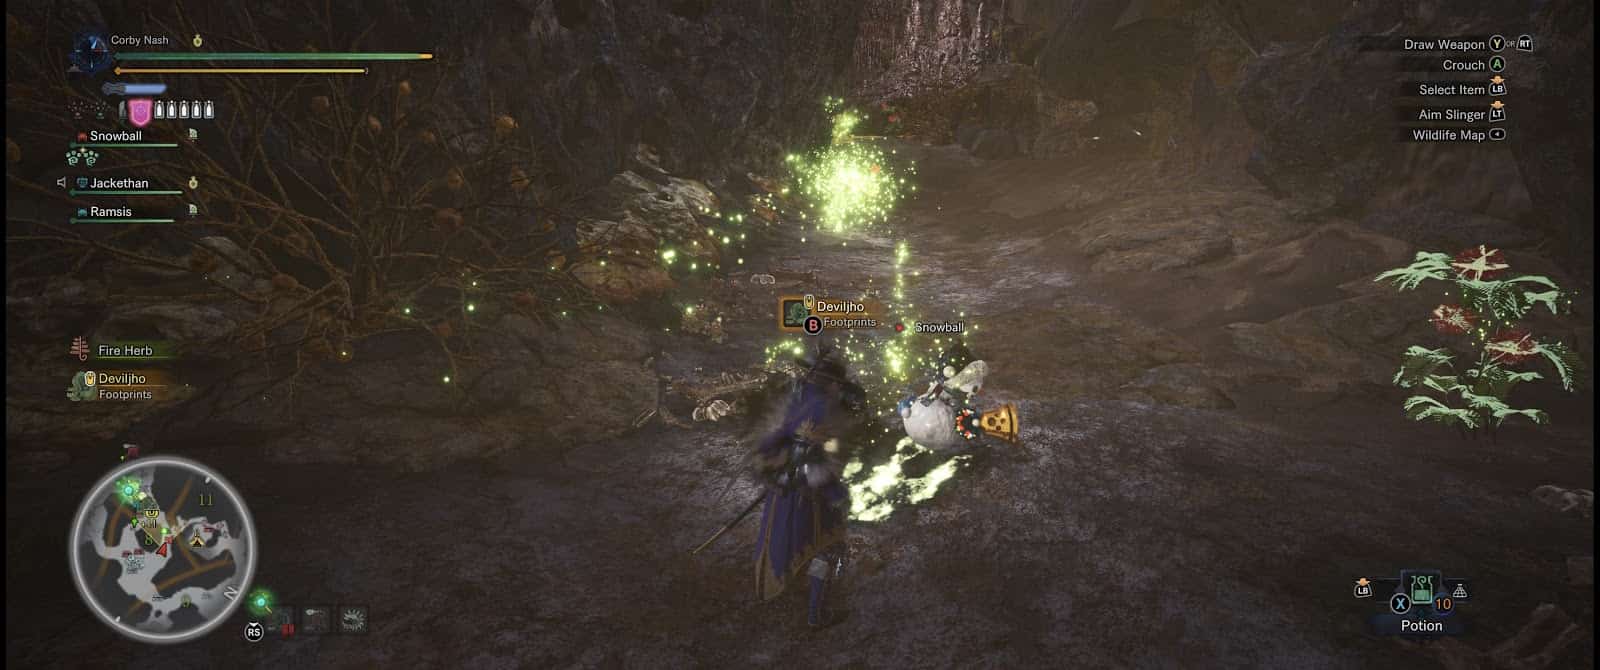
Once those initial conditions are fulfilled, you’ll need to search for Deviljho tracks in much the same way that you did to find the Pink Rathian, but this time, there’s no official quest just yet. Head to the quest board and look for any high-rank quest, investigation, or expedition that has “???” in the section that tells you which monsters are present in the area.

The Deviljho could appear anywhere, so it doesn’t matter which area you go to, as long as there’s a “???” entry. Once you’re in the right area, one of two things will happen. Most likely, you’ll collect enough Deviljho tracks (labeled “???” tracks at first) to fill the research bar, but there’s a small chance you could stumble upon the beast itself. In the latter case, don’t try to fight it; it will run away once it detects you.
After you’ve met either of those requirements, head on back to Astera and look for a group of three researchers in the Trade Yard with blue exclamation points above them. Talk to all three and you’ll be asked to look for more evidence of the as-yet-unidentified monster. As before, launch any high-rank expedition, investigation, or quest, and look for more Deviljho tracks. Keep collecting them until you get a notification that a new investigation is available.
Return to the three researchers and they’ll give you a quest called “The Food Chain Dominator.” The next time you see a Deviljho, it’ll be a fight to the finish, so take your time getting ready.
Preparation
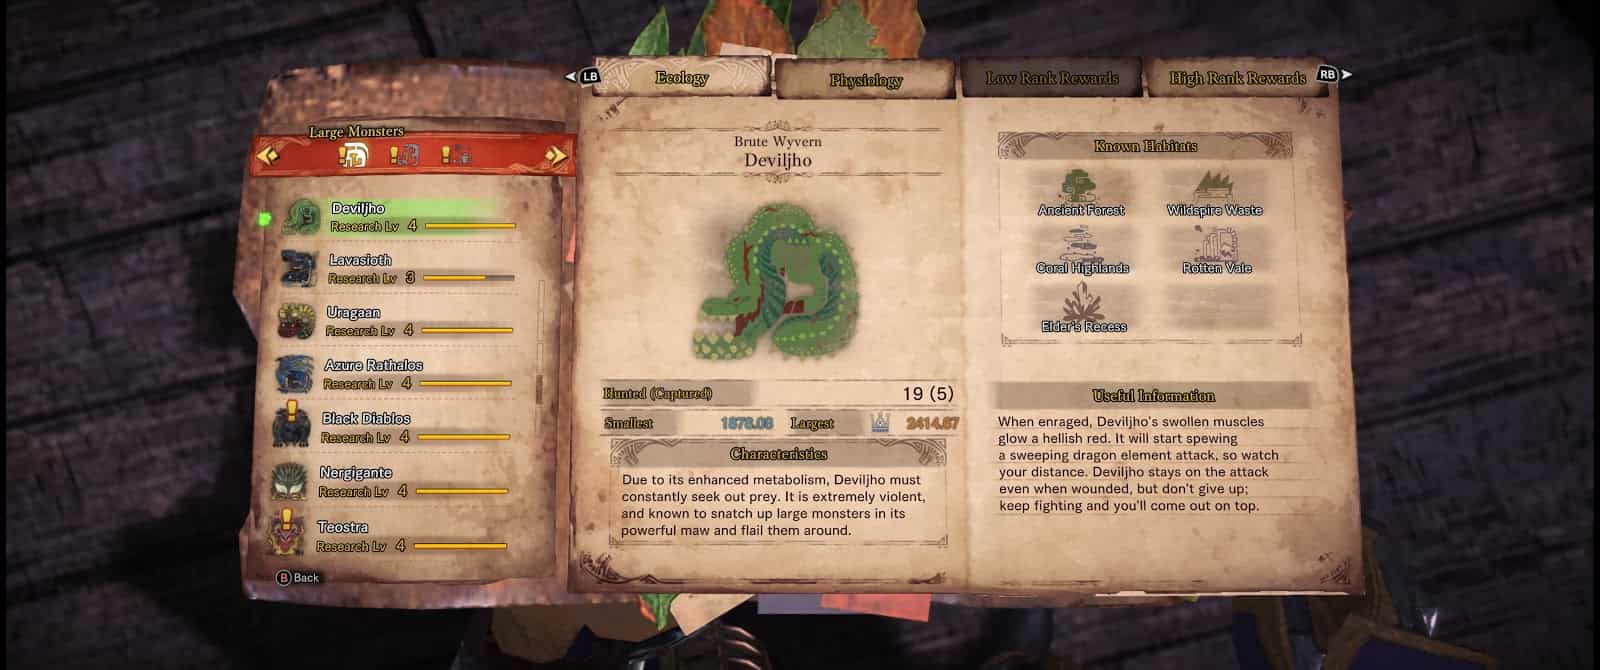
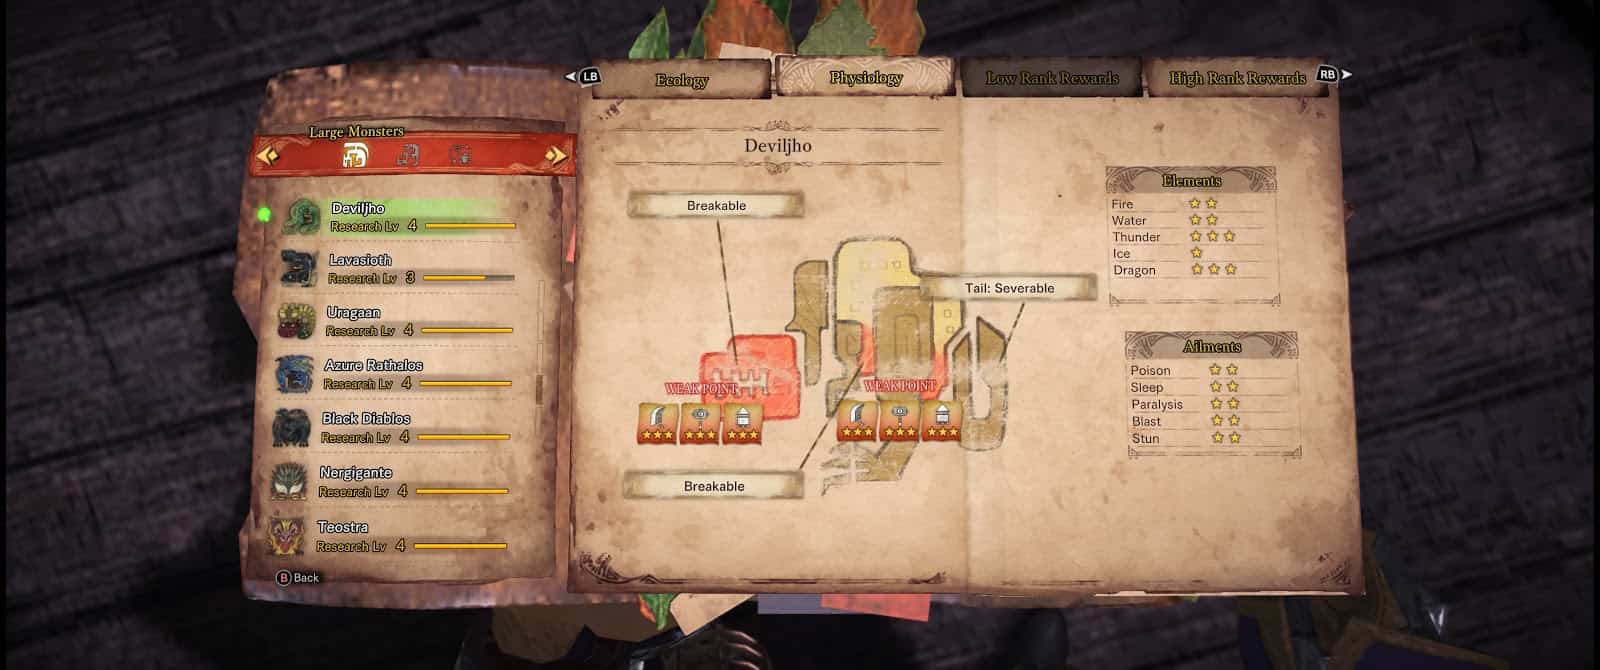
Have a look at Deviljho journal pages. As you can see, dragon and thunder are the best elements to use against the Deviljho. (Charge blade users rejoice, because all of your weapons can deal thunder damage!) Fire and water weapons are okay, but ice is a waste of time. If you prefer status effects over elemental damage, choose whichever one you like best, because your quarry is equally susceptible to all of them.
Whatever you decide on weapon-wise, make sure your beef up your defense against dragon elemental damage as much as possible. The Deviljho’s physical attacks are brutal to begin with, and he has a large AoE ranged breath attack that can inflict the dragon debuff, which will increase the damage from his other attacks even further and cancel all elemental damage that you deal.
So, what should you pack in your item satchel? Traps are a must, even if you don’t plan on capturing the Deviljho alive. Once you deal some real damage to him, he gets pretty mad, so traps are excellent for immobilizing him long enough to get in some hits without fear of counterattacks. Flash pods are also a good idea, since he’ll be less likely to hit you if he can’t see you.

Finally, bring some extra materials to craft more traps and pods, as well as attack- and defense-boosting potions. We recommend packing a Vitality Mantle in your reusable item slot, but if you’re more comfortable with other stuff, go with what you know. For your pre-hunt cantina meal, we’d advise ordering something that boosts physical defense and/or attack power—keep it simple.
If you’re planning on tanking this monster with a shield or staying in the air with an insect glaive, you’ll need as much stamina as possible, so you might also consider a stamina-boosting meal. In any case, make sure you eat at the cantina in Astera, because, for some reason, the handler and chef cats are not available during this particular mission.
Viable Builds
At this stage in the game, you probably don’t have ultra-high-tier equipment yet (unless you’ve done a lot of other high-level coop missions with other people), so we strongly advise playing to your biggest defensive strength, whether it’s speed or armor.
Hybrid builds that try to balance both won’t fare well against your very first Deviljho. His attacks are very strong and he can chain them together quickly, so it’s important that you be able to either dodge them altogether or soak them with heavy armor.
Deviljho likes to roar a lot and his attacks deal high stun damage, so Earplugs and Stun Resistance are excellent armor skills to bring along. Fortunately, he can’t inflict any other status effects, so you’re free to focus on the essentials: physical damage resistance, dragon elemental resistance, and/or attack power and stamina enhancements.
Despite his size, Deviljho is quite fast, so you may have a hard time hitting him with very slow weapons. If you’re going after him alone, consider bringing a fast weapon so you can stay on his heels or an excellent shield that will allow you to block his combos and counterattack when he pauses to recover.
Finding the Monster
When you feel ready, accept the “Food Chain Dominator” quest and head out. Regardless of where you last saw Deviljho tracks, your first showdown will happen in the Ancient Forest. Whereas most monsters like to hang out in certain areas of each zone, this one is pretty nomadic, so he could be anywhere. Keep your eyes peeled for tracks and stay on his trail until you catch up to him.
Bringing it Down
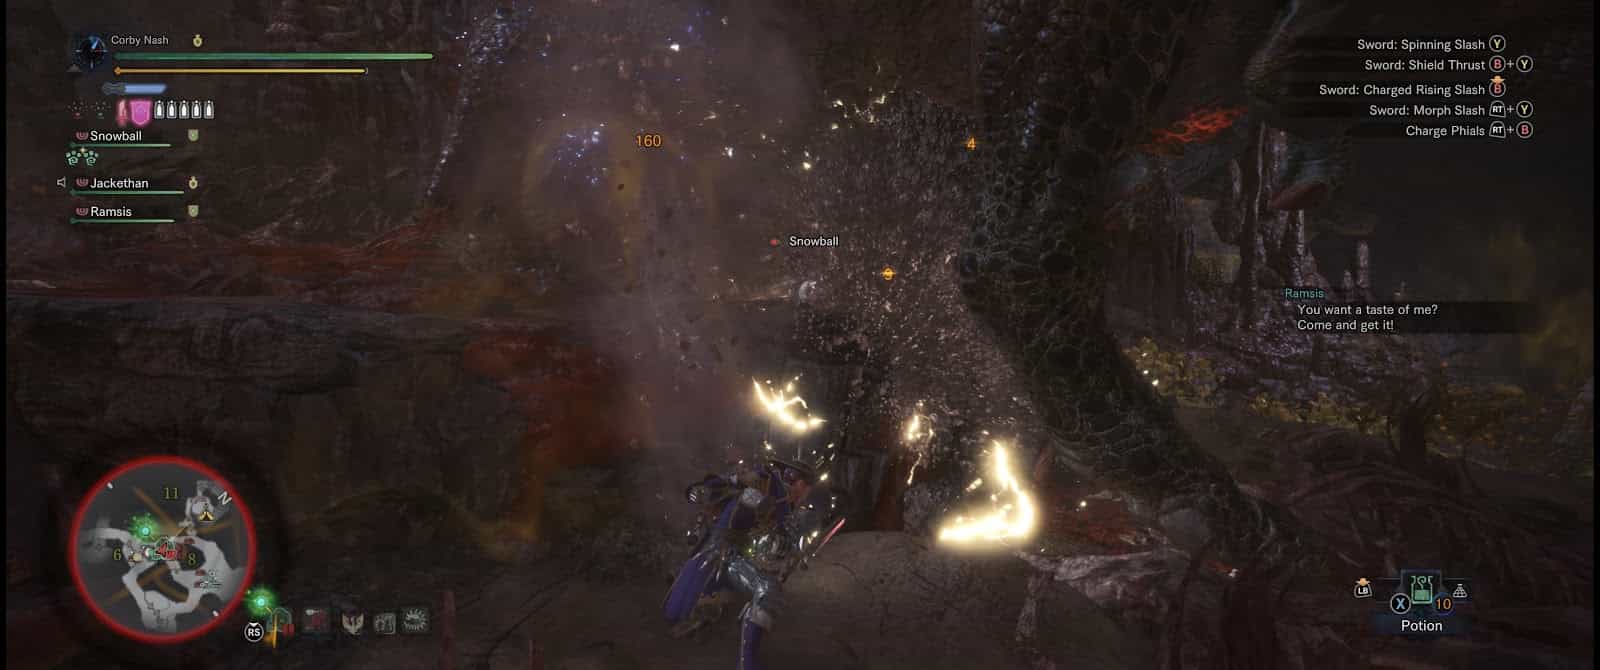
Unless you’re very confident and very good at this game, this battle is best fought defensively. Deviljho has five main attacks that you should be on the lookout for: a forward charge, a tail slam, a sideways body slam, a breath attack, and a vicious bite-and-throw combo.
As long as the scales on his head and back are dark gray, he’s not too angry. (He’s always mad, he’s just not super-duper mad yet.) In his normal state, he tends to mostly use his tail and body slam attacks. The best position for tank-like builds is behind one of his legs, but not directly under his tail.

When you’re in that spot, his tail slam (which hits straight down) and his hop-to-the-side body rush are both very likely to miss you entirely. Stab his thighs in relative safety.
The forward charge is more problematic. You’ll know it’s coming when he lowers his head, so either get out of the way or block it, if you’re sure you’ve got enough stamina and a big enough shield to do so. If the charge connects, expect to take high damage and possibly be stunned. Even worse, if he does stun you with the charge, he’s likely to follow up with the bite-and-toss attack, which very well might finish you off.

His last nasty attack is a semi-circular breath cloud that covers a large area in front of him and inflicts dragon status if it connects. If he hops backward and rears his head, that’s your cue to either run far to one side or to back off to a distance of at least 20 meters, if you’re in front of him.
The breath attack can be blocked; doing so will reduce, but not eliminate the chance of being afflicted with dragon status, so it’s best to dodge it if you can. If you do get tagged with dragon status, eat a Nullberry to get rid of it.
Once you’ve dealt some real damage to him, he’ll start getting upset. When his scales turn red, expect him to really step up his game. He’ll charge, tail slam, and bite much more frequently, and he’ll jump around a lot more. Now’s a good time to blind him with some flash pods and to put on your Vitality Mantle if you brought one. You could also drop some traps, but be aware that they’ll only hold him for about half as long when he’s enraged.
At some point, he’ll run off when he’s had enough of you. When you give chase, keep your eyes open—Deviljho is actually capable of ambushing you in certain areas of the map. Yes, that giant green dinosaur can leap out of a tree and land on you, and it really hurts, so stay alert.
From here on out, the basic strategy is the same as it is with most other monsters. Above all else, be patient. You have a generous time limit during this mission, so don’t rush. Play defensively and watch for good openings to attack him. Deviljho can knock out young hunters in as few as two hits, so avoid taking damage whenever possible.
Keep up the slow, steady pressure and your quarry will eventually retreat to his nest to heal. Once he falls asleep, you can capture him alive, or drop some barrel bombs on his head if you’d prefer to finish him off. Deviljho has a lot of health, so just remember that time is on your side. Slow is smooth and smooth is fast, as the Navy SEALs say.
Now that you’ve got a new stuffed Deviljho head on your wall, what will you hunt next? If you haven’t yet taken on the semi-optional Bazelgeuse, maybe now is a good time. (It just so happens that we also have a Monster Hunter World Bazelgeuse guide, so check it out if you want some pointers.) Or maybe even Anjanath. You choose.
Now that you know how to defeat Deviljho, maybe you’d like to play some of the best RPG games, or maybe even amazing open world games!