If my room was any kind of organized, I would show you my case, this big, towering black monstrosity made of steel. Fun fact: It actually auditioned to be the monolith in 2001: Space Odyssey, but it got turned down because they deemed it too imposing.
Of course, not everybody is a tech nerd like me (or trying to compensate for anything), and you might prefer a case with a smaller footprint. This is where Micro ATX motherboard and cases come in. You might also prefer something smaller like Mini ITX cases and we do have an article on that (written by yours truly).
Alternatively, (if you’re not into the whole “micro” thing), check out the overall best gaming PC cases.
But, let’s move on from the upsell and get into the meat of things. So, what are the best mATX cases for 2020? 🖥️🤔
Best Choice: Thermaltake Core Cube

Pros & Cons
- Massive amount of customization
- Can be oriented any way you like
- Amount of variability might be overwhelming for some
- In some configurations, the PSU might exhaust into the motherboard
Specifications:
- Dimensions: 13.20″ x 12.60″ x 16.70″ (335mm x 320mm x 424mm)
- Graphics Card Max Length: 13.77″ (350mm)
- Drive Bays: 3 x 3.5″ / 2.5″; 3 x 2.5”
Fan Options:
- Front: 2 x 120mm / 2 x 140mm / 1 x 200mm (1 x 200mm fan 800rpm, 13dBA, included)
- Top: 4 x 120mm / 2 x 140mm
- Rear: 1 x 120mm / 1 x 140mm
- Bottom: 2 x 120mm
- Side(L/R): 2 x 120mm / 2 x 140mm
- And a lot more that are optional, but we can’t list it here because we’d run out of internet.
Radiator Options:
- Front – Up to 240mm
- Rear – Up to 120mm
- Side – Up to 240mm
- Side – Up to 280mm
- Top – Up to 280mm
- Top – Up to 480mm
- Same as the fans, just way too many ways to configure this
Thermaltake Core Cube Review
The literal plethora of ways this mATX case can be configured is truly mind-boggling and is both a positive and a negative.
For starters, since it’s a cube, you can easily remove any side panel, and put it in the place of any other side panel. Then, you can remove the face mesh and rotate it to any angle you want, including the Thermaltake logo, which sticks magnetically and can also be removed and rotated so it’s aligned properly.
And even more then, you can actually remove the front-facing I/O panel and move it around along with the front panel, so that it’s not sticking out the end that’s far away from you.
And all that’s just the outside, when you get on the inside it’s a similar story. There are a few rails placed around the frame which you can mount fans or radiators on, and which are also removable and placeable anywhere on the frame. So if you want a glass panel on top, and an unobstructed view of the internals, you can do that.
Pretty much the only thing that can’t be altered is where the motherboard and the PSU you sit, arguably that’s one of the biggest issues. Since the PSU and motherboard locations are set, then depending on how you configure the Core Cube, you might have to angle the PSU’s internal fan towards the motherboard.
Now, if you’ve ever been near a PSU exhaust, you know how hot it can get, and you’ll also know that combining that with a sensitive motherboard and possibly a CPU is not the best of ideas.
That’s not the end of the world though since you can (and I suggest you should) orient your case so that PSU’s exhaust can escape upwards between it and the motherboard. It’s not a perfect solution, but it’s better than nothing.
Otherwise, this is an absolutely amazing case, with tons and tons of options for fans, radiators, orientation and pretty much anything your heart could desire. If you want it to look a bit less minimalistic, we recommend pairing it with some awesome RGB case fans.
Premium Pick: SilverStone Technology Fortress 3

Pros & Cons
- Great build with thick aluminum
- Can support an ATX power supply
- Rotated motherboard design may be weird for some
Specifications:
- Dimensions: 11.18″ x 9.25″ x 19.17″ (283.9mm x 234.9mm x 486.9mm)
- Graphics Card Max Length: 13.77″ (350mm), width restriction – 6.57″ (167 mm)
- Drive Bays: 1 x 2.5”; 3 x 3.5”
Fan Options:
- 1 x 120mm exhaust top fan, 1200rpm, 22 dBA
1 x 92/80mm optional top fan (not include) - 2 x 120mm intake bottom fans, 1200rpm, 22 dBA
2 x 80mm optional bottom fans (not include)
Radiator Options:
- As a replacement of any of the fans mentioned above
SilverStone Technology Fortress 3 Review
When first looking at this thing, feeling a bit mixed about it is normal. On the one hand, it’s basically a rectangular box, but on the other, anodized, aluminum finish looks really pretty.
Once you pop the hood off (so to speak), you see that this mATX tower is actually hiding quite a lot of features, and the one that pops out the most is that it’s designed to take the motherboard at an angle.
Where you would traditionally have your I/O panel facing the back, with the SilverStone FT-03 it’s actually facing upwards. In fact, that’s how you reach the IO panel and expansion bays: by removing the top.
While you’re there, you’ll also notice another iffy feature, which is the hot-swappable expansion bay for a 3.5” HDD. I say that it’s iffy because you have to remove the top to get to it, which seems like an extra bit of hassle that isn’t needed if they just raised it a bit to be flush with the top cover.
Thankfully, that’s it in terms of weird design choices, and everything else is pretty standard and actually smartly designed. As I said, the motherboard is fitted at a 90-degree angle, so any graphics card you put in is fitted vertically, so you have lots of room to put a long(ish) GPU.
There is one caveat though, which is that there is a bottom fan that blocks a bit of the space, requiring you to remove it if you want the full 13.77″ (350mm). With it on, you’re probably looking at 10” (254mm)- 11” (279mm).
You’ll also be happy to know that there’s lots of room to fit in a great CPU cooler, with an allowance of 6.57’ (167mm), which is a lot actually. A similar happy little thing is that there’s space for a 3.25” disc drive bay if you still use that sort of thing.
Finally, in the list of happy things, the Silverstone Fortress 3 can fit a full-sized ATX power supply, so you can absolutely run your big ‘ol GPU, a hefty CPU and still have the power to do some overclocking (assuming your hardware can support it).
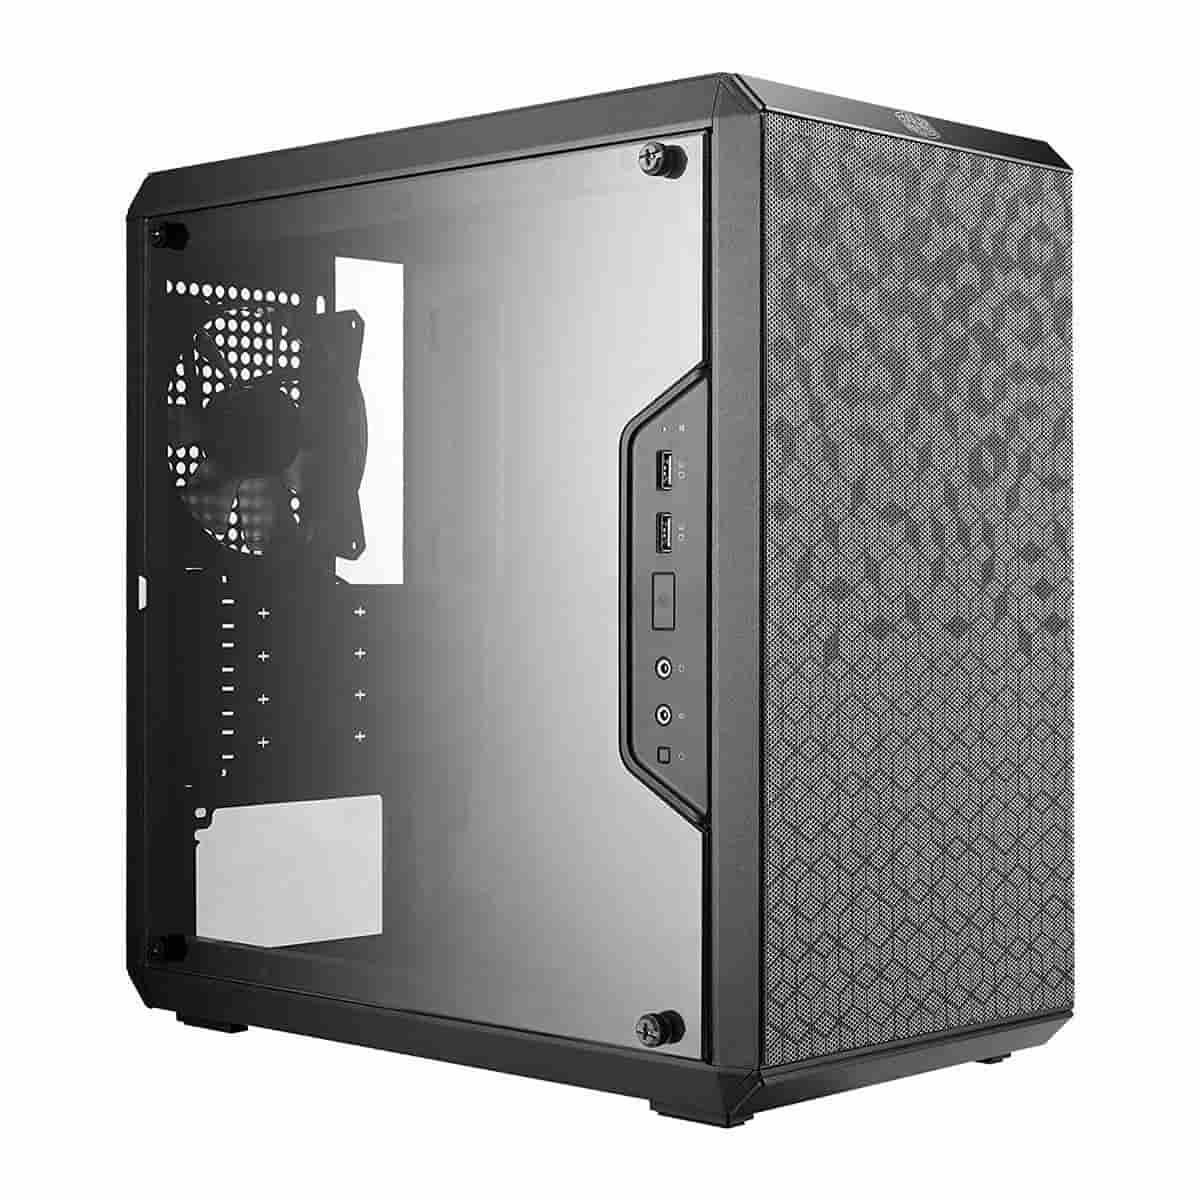
Best Value: Cooler Master MasterBox Q300L
Pros & Cons
- Sleek and pretty
- Acrylic side panel if you like to see the internals
- Good cable management options
- Ventilation not that great
Specifications:
- Dimensions: 14.88″ x 9.06″ x 15.24″ (377.9mm x 230.1mm x 387.0mm)
- Graphics Card Max Length: 14.17″ (360mm), width restriction – 6.57″ (167 mm)
- Drive Bays: 1 x 3.5”; 2 x 2.5”
Fan Options:
- Front: 2 x 120mm / 2 x 140mm fan
- Rear: 1 x 120mm fan (Pre-installed)
- Top: 2 x 120mm fan
- Bottom: 1 x 120mm fan
Radiator Options:
- Front: Up to 240mm
- Rear: Up to 120mm
Cooler Master MasterBox Q300L Review
Ok, before we get started, I have to say, even though this is a cheap/budget mATX case, it’s actually really pretty. Unfortunately, since it is a budget case, there’s some not so great things about it.
For one, the packaging isn’t the best, and you might find that the front mesh filter is bent. You can flatten it out by letting sit under something heavy, but it’s certainly not the best first impressions. Similarly, the additional stuff that comes with the case is just set loosely inside the case itself, and it can cause some damage if it’s not been handled well in transit.
Moving on from the packing, inside you’ll find absolutely tons of space, meaning you can fit pretty much any GPU, PSU and CPU cooler you fancy. Cable management is reasonably good, with lots of openings and tie spots, something which isn’t common on most mATX and smaller towers. You also have quite a few fan options, although nothing compared to the Thermaltake Core Cube.
Speaking of the Core Cube, you can similarly alter where the I/O panel goes, even on the left side panel area, which is certainly a bit weird. Since only the plastic panel is compatible with the I/O, you’d have to move the panel to the other side if you want to put your I/O there.
This isn’t necessarily the worst, especially if you don’t want the plastic panel and would rather have a closed tower look.
One final thing I will say is that the Thermaltake Core Cube is an excellent case if you’re just starting out building PCs. With so much space, it’s very forgiving in terms of assembly and cable management, and you won’t have to worry too much about hardware fitting inside. It’s also affordable, which makes it one of the best budget PC cases.
Best Overclocking: NZXT H400i

Pros & Cons
- Good cooling options
- Adaptive noise reduction
- Pretty Lighting
- Great cable management
- Non Optimal Airflow
Specifications:
- Dimensions: 13.7 x 8.3 x 14.6″ (349 x 210 x 372mm)
- Graphics Card Max Length: 12.8″ (325mm)
- Drive Bays: 1x 3.5”; 4x 2.5”
Fan Options:
- Front: 2 x 140mm or 2 x 120mm fan
- Top: 1 x 120mm fan
- Rear: 1 x 120mm fan
Radiator Options:
- Front: Up to 240mm
- Rear: Up to 120mm
NZXT H400i Review
If you’ve read some of our other reviews, you’ll have noticed the NZXT H400i come up in our best pics for mini-ITX cases. Well, you’ll be happy to know that it’s actually a great case for Micro-ATX as well! It’s size, RGB and other features make this a perfect case for those of you who want to build a gaming desktop.
One thing that does make it great for gaming, is that you have the option to fit some good-sized radiators. While I doubt you’d be able to SLI on this thing, you can absolutely do a bunch of overclocking if you use the radiators. Otherwise, the case does tend to have an issue with thermal dissipation.
Of course, you might not only want to game, but rather do some editing as well, and the 5 different drive bays will more than serve the tons of storage you’ll need. Cable management is also pretty good, although certainly not the best, and it might be difficult for less experienced builders.
This case also comes with RGB lighting and fan controls in the form of a smart device. Much like the other article though, we would suggest you skip getting the H400i and get the ‘non-i’ version which doesn’t include this device. It knocks about $40 off the price, and you can certainly buy cheaper (or better) smart devices, or just not have one at all.
All in all, this is a great case for those who need a slightly smaller form factor, while still providing the same features and aesthetics you’d expect out of a larger gaming tower.
Best Cable Management: Corsair Carbide Series Air 240

Pros & Cons
- Well built
- Lots of ventilation
- Not that pretty
- Not made for your traditional desktop rig
Specifications:
- Dimensions: 12.60″ x 10.24″ x 15.63″ (320 x 260 x 397mm)
- Graphics Card Max Length: 11.4″ (290mm)
- Drive Bays: 3x 3.5”; 3x 2.5”
Fan Options:
- Front: 2 x 120mm fan
- Top: 1 x 120mm fan
- Bottom: 2 x 120mm
- Side: 1 x 120mm
- Rear: 2x 80mm fan
Radiator Options:
- Bottom: Up to 240mm
- Front: Up to 240mm
Corsair Carbide Series Air 240 Review
As computer parts get cheaper, and the stuff we store getting larger, it makes sense that you’d want some kind of home storage or server solution and with it’s 6 total bays, the Air 240 delivers.
Access to the aforementioned drive bays is pretty easy, with the 3.5” bays accessible from the back, and the 2.5” bays accessible from the top, after you remove the top panel.
Sadly, none of them are hot-swappable, which makes the drive bay access stuff essentially useless, since you’ll need to open the case to disconnect them anyway. Speaking of panels though, you can absolutely move them about, much like the Core Cube, and even the Corsair logo is a magnet and easy to realign.
This mATX case, much like its bigger sibling, is a dual-chamber design, with the drive bays and PUS sitting on one side, and everything else sitting on the other. This makes cable management somewhat easier since you can essentially just stuff all the cables in the storage chamber and not worry about it looking ugly.
That being said, you could do a bit better cable management and add another couple of drives in there with a DIY mounting solution.
Now, you can also game on this, and it can accept a certain range of GPUs, but due to its dual-chamber design, it does it up a bit of space, so you will have a height limit. Similarly, it would be hard if not impossible to fit radiators at the top, since there’s no clearance. At the bottom, the motherboard headers are also likely to get in the way, unless maybe you go with Mini ITX one.
While the Air 240 isn’t perfect, and not the best suited for gaming, it is an excellent case for home storage or as a general home server. But if you’re looking for something that could offer more space, than you better check out our list of the best mid-tower PC cases.
Thermaltake Level 20 VT

Pros & Cons
- Tempered glass on all sides
- Some good cooling options.
- Cable management is a nightmare
Specifications:
- Dimensions: 13.70″ x 13.00″ x 16.90″ (347 x 330 x 429mm)
- Graphics Card Max Length: 13.7″ (350mm)
- Drive Bays: 3x 3.5”; 3x 2.5”
Fan Options:
- Front: 2 x 120mm / 2 x 140mm / 1 x 200mm fan
- Top: 4 x 120mm / 2 x 140mm fan
- Bottom: 2 x 140mm fan
- Rear: 1 x 120mm / 1 x 140mm fan
Radiator Options:
- Top: 2 x 120mm or 2 x 240mm or 1 x 180mm (200mm Fan)
- 1x 140mm or 1x 280mm
- Front: 1 x 120mm or 1 x 240mm or 1 x 180mm (200mm Fan)
- 1 x 140mm
- Rear: 1 x 120mm
Thermaltake Level 20 VT Review
While I personally don’t enjoy too much RGB lighting, I know that there’s lots of people out there who do. Thermaltake also apparently knows this, which is why they’ve designed this case specifically for you.
For starters, the top and two side panels are made of tempered glass, so you get an essentially unobstructed view of the internals from all angles. Since this is somewhat base off of the Core Cube, you can also move side panels around, with the internal fan rails also movable, depending on what you prefer.
Unfortunately, though, you’re essentially stuck with only using one ‘open’ side with any clearance, since the other two sides fit flush with the case and stop you from using any kind of fan or radiator.
Of course, since the side panels are glass, there’s basically no cable tie spots anywhere to be found on them. The cable management nightmare doesn’t stop there though, because, under the motherboard tray, where the PSU and drive racks are placed, there are no cable tie spots either. So essentially, you’re left with trying to cram everything underneath out of the way.
Fortunately, though, that does provide a more unobstructed view of your hardware. As such, you can pretty much stick as much RGB you can in there, whether it’s the fans, the RAM or even some RGB strips.
Either way, Level 20 VT lays it all out bear for everybody to see, if that’s your thing.
Micro ATX Case: Buying Guide
Thankfully, Micro-ATX cases are not as difficult to deal with as their smaller siblings, the Mini-ITX. That means you have much more leeway in terms of hardware, although you should absolutely still do your research. Space is at a premium inside these cases and they can be hard to assemble, even with perfectly fitting hardware.
CPU/GPU Sizing
Since we’re talking about tighter internal spaces as compared to an ATX case, you really have to be careful in how you pick your CPU cooler and GPU. Most manufacturers do tend to list allowable tolerances for both, so it should be a simple matter of adding the numbers up and making sure everything fits.

Just be prepared to do a bit of work.
Dimensions
While you’d think that all micro-ATX cases are smaller than normal ATX cases, that isn’t always the case. It’s important to make sure the exact dimensions that you are working with and match that to the case you’re buying and maybe add a little bit extra just in case. This might sound like completely obvious advice, but a lot of people have done this mistake, and you’re better off measuring twice.
Fan/Radiator Options
Similar to CPU/GPU sizing, you need to be supremely aware of what you’re dealing with. A lot of cases might have options for radiators, but there might not be enough clearance to fit the fans. Similarly, if you’re not going for a CPU all in one cooler, then clearances become an even bigger issue for the cooler.
Finally, if you’re aiming for top-notch cooling, you might want to take a look at the best cases for water-cooling installation.
Frequently Asked Questions
What Is the Difference Between ATX and Micro-ATX?
Primarily size, but you also tend to get fewer ram and PCIe slots.
Are Micro-ATX Motherboards Good?
If you need to use a smaller case, absolutely. Otherwise, it might be easier to deal with a normal ATX motherboard. As mentioned, you also get more ram and PCIe slots.

Anyway, if you’re into playing video games, no matter the PC case size, it’s important for you to pick the best motherboard for gaming, ’cause it really matters what’s inside your PC case.
Will a Micro-ATX Motherboard Fit an ATX Case?
In 99% of the circumstances, yes. I don’t want to give you a 100% because I can’t account for some weird, crazy knock-off cases out there that I’ve never seen before.
What PSU Can I Use With a Micro-ATX Case?
That depends completely on the kind of case you buy. Some cases can support full ATX PSUs, some don’t. You need to read the specifications to make sure.
What Is the Best Case for a Gaming PC?
Any case that can fit a high-end GPU, and good cooling for your CPU. So really, you can have a gaming PC in a Micro-ATX and even a Mini-ITX, depending on what GPU your case can handle.
Conclusion
Micro-ATX has really become a burgeoning field in the past couple of years, which has led to a lack of standardization and a lot of experimenting with what works best. That does make it a tad difficult to find the right choice for you, but hopefully, the ones’ we’ve listed up above can give you better handle on the situation.
Either way, whether you’re new to computer building or a veteran, I wish you the best of luck!